Okay, so I know that if your anything like me, when Spring rolls in each year, you start thinking about planting. Planting seeds, veggies, bulbs, and hopefully planting trees. So do you have plans this season to plant any new trees? Let’s talk about it!
Step 1. Plan Out Your Planting Site.
Your tree will grow.
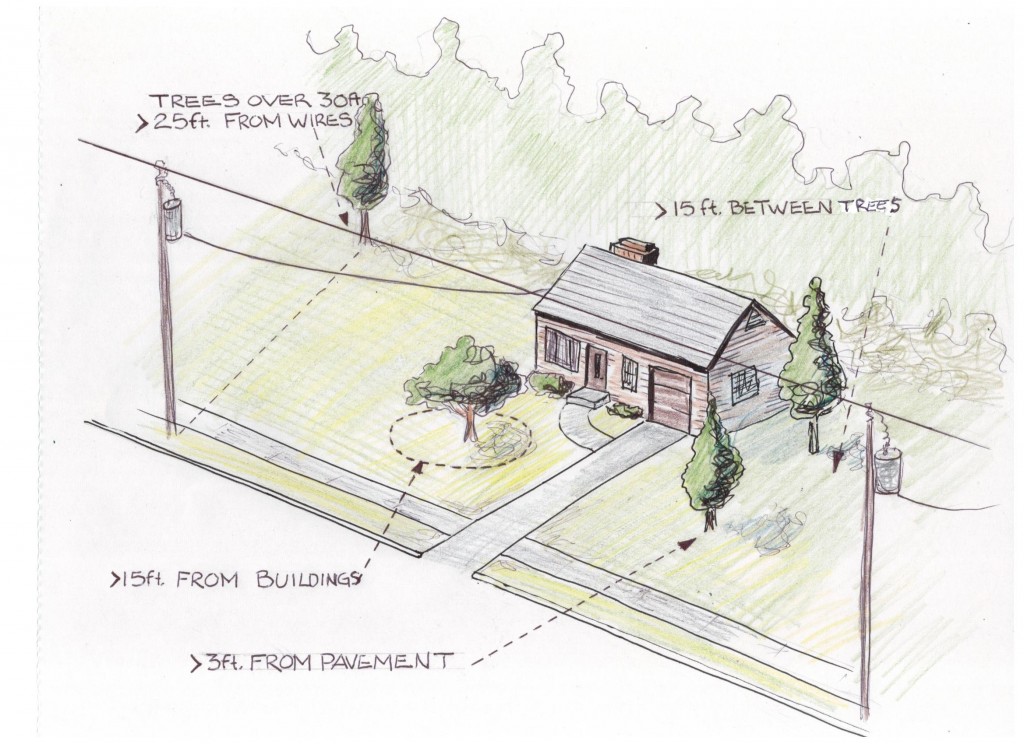
Do not plant your tree where it will interfere with buildings, overhead utility lines,
pavement, or intersection sightlines as it gets bigger.
Make sure your planting spot is at least. . .
- 3 feet from pavement or fencing on all sides
- 15 feet from buildings or other trees
25 feet from overhead electric wires, if your tree will grow taller than 30 feet.Check Below Ground
Before you dig, call the underground utility locating service in your area to be sure that there are no buried utilities where you want to plant.
Here on Cape Cod the number to call is (888) 344-7233.
At least 72 hours in advance of planting, call the underground utility locating service in your area to be sure that there are no buried utilities where you want to plant. Most services will mark utilities (e.g., electric, cable, gas) for free.
Step 2. Moving the Tree
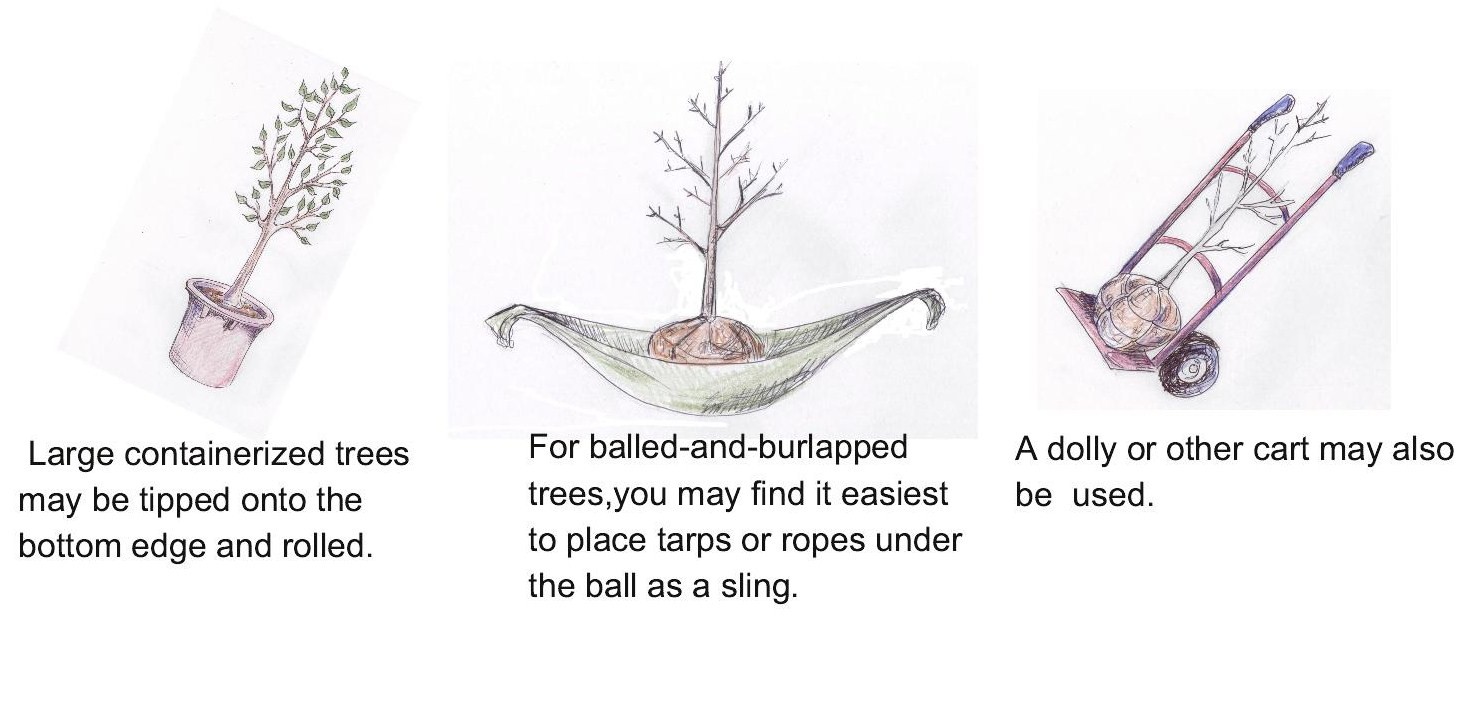
Carry your tree by its root package (ball or container)—not the trunk! Steady it by holding the lowest part of the trunk.Protect the trunk while moving your tree. Even a small wound on a young tree can cause permanent damage.
Step 3. Remove Trunk and Branch Packaging
Remove trunk wrap, twine around the branches, and labels. Leave any root packaging in place for now.
Step 4. Prune Critical Branches Only!
Prune only branches that are broken or dead. You may also remove competing leaders, if present. Most trees should have one central leader. If there are two or more leaders, choose which one you want to remain and remove the other(s).
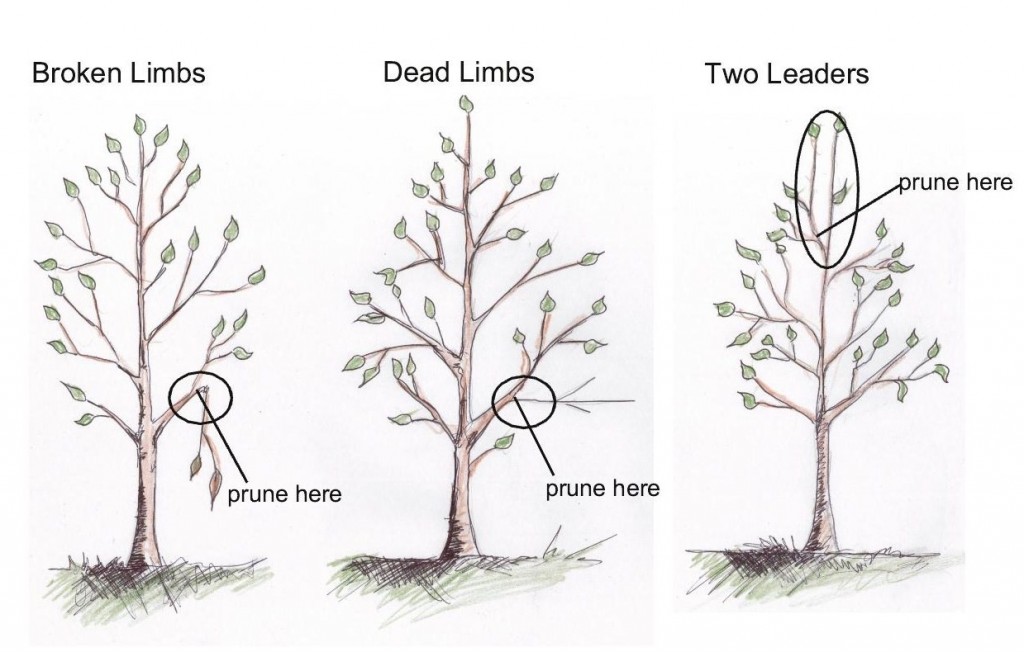
Minimize pruning at the time of planting! Trees need as many leaves as possible to recover from transplant shock (leaves produce the tree’s food).
Step 5. Find the Main Root System, and Remove Excess Soil.
Remove soil from the top of the root ball until the top of the main root system is exposed. There should be several roots at least as big around as a pencil extending in opposite directions from the trunk. You may have to remove 2-4 inches of soil before finding the main roots.
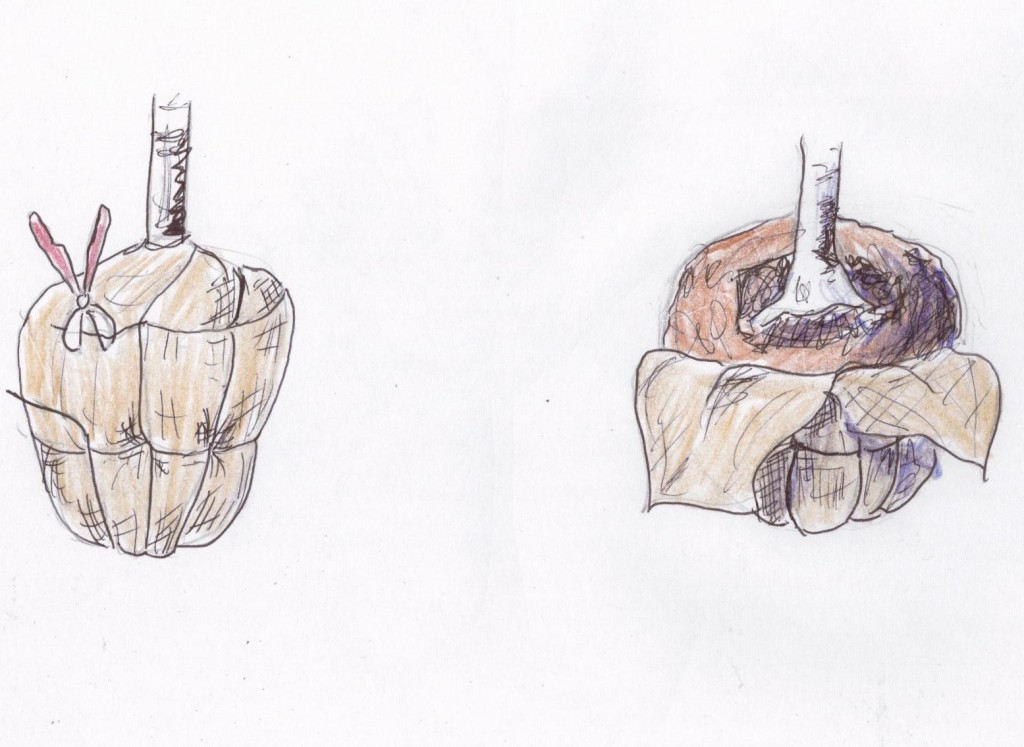
New trees are often buried in the rootball or container when they come from the nursery.
Remove the top of the root ball packaging. Cut any twine from around the trunk taking care not to nick the bark. Then bend the wire basket back off the top of the ball. Remove soil from the top of the root ball until the main root system is found. You may have to cut some of the wire. Leave the rest of the wire basket in place until the tree is put in the ground.
Step 6. Remove Problem Roots.
Remove all small roots above the main root system with a hand pruner.
Examine the main root system for roots that extend out but then turn to the side or back towards the trunk. Prune these roots at the point where they turn. If left these circling roots can later become a big problem for the tree.
Step 7. Dig the Hole
Don’t put a $100 tree in a $10 hole! The dimensions of the hole are very important in determining the survival of your tree. Dig the hole ONLY as deep as the root system (NO deeper!).
Measure the height of the remaining root ball. This is exactly how deep you should dig the hole.
Measure the approximate width of the root ball or root system. Multiply this by 2, or if your soil is hard (clay or compacted), by at least 3. This is how wide you should dig the hole. DON”T GUESS!
HOLE DEPTH = height of root ball
HOLE WIDTH = width of root ball 2 or 3x
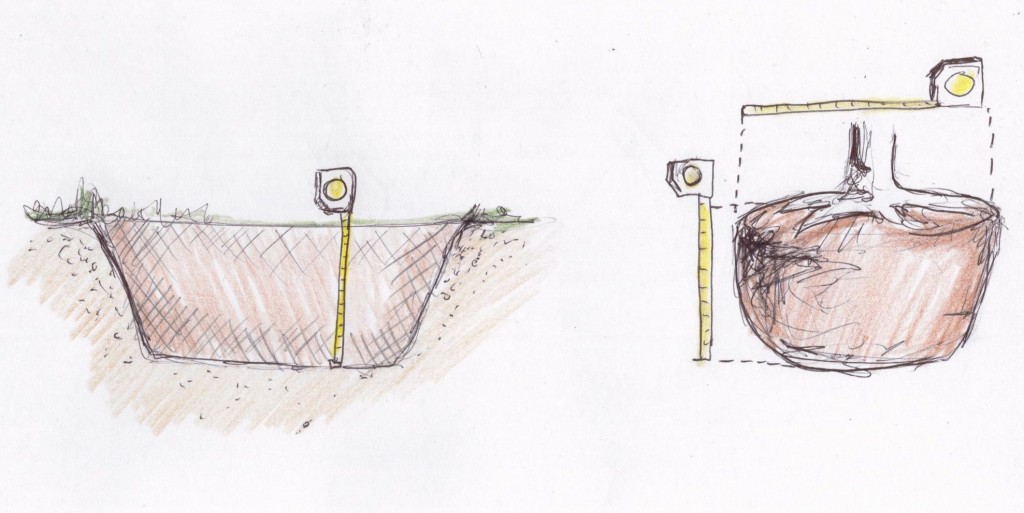
Step 8. Put Tree in the Hole
If the tree has a heavy root ball, slide it into the hole, and straighten the trunk. Be very careful at this point to not let the root ball fall apart.
Step 9. Remove Root Ball Packaging.
(for Balled-and-burlapped trees)
Balled-and-burlapped trees up to this point still have most of the packaging intact: Without loosening the root ball, cut, peel back, and remove as much of the wire basket and burlap as possible (at least the top third).
A root ball should remain a root ball. If it starts to fall apart as you take off the
wire and burlap, backfill the hole with enough soil to stabilize it. Then carefully remove the wire and burlap, and backfill as you go to keep the root ball intact.
Step 10. Backfill With the Same Soil.
Make sure the trunk is straight. Put the original soil back in the hole, breaking up large clods, and working it in with your hands or a shovel.
Step 11. Water.
Water the root ball and entire backfilled area. Larger trees should be watered in as the hole is backfilled. Back fill hole about half way and then water in and let the water and soil settle in around the root ball.
Step 12. Mulch.
Put a 2-4 inch layer of mulch over the backfilled area. Pull mulch away from the trunk so that none touches the bark. There should never be more than 4 inches of mulch over the roots. Too much can prevent the roots from getting necessary oxygen.
To Stake or Not to Stake
Some trees need to be staked to remain standing straight in their new planting site. Stake only if the root ball is unstable or the trunk is bending. Use wide nylon, canvas straps, or nylon stockings wrapped around one side of the trunk. The tree should not be tied tightly.
If the root ball is unstable, use 1-3 stakes attached LOW on the trunk. If the trunk is bending, use 1 stake attached HIGHER (at least 6 inches below the first set of
branches).

Comments
I’m glad that you emphasized how important it is to plan where your tree will be. You don’t want the roots to interfere with sidewalks, buildings, or underground utilities as the tree grows. Locating where the underground utilities are is important to prevent damage to pipes, even if you’re not digging that deep. Thanks for the article.
I thought it was a good idea to not plant trees too close to power lines. Growing up, we had some awesome trees for playing in, but they got taken out because they grew too close to power lines. That’s a sad thing for a little kid! I thought these were some good tips. Especially about the pruning, though I don’t think I could do a very good job on my own.
Thanks for the post. I agree that you need to make sure you know exactly where you are going to plant your tree. I think if your just moving a tree in your yard to another close area than its not super important, but if your having a large tree being shipped in than you really need to know the location. That will ensure that your not wasting their time.
Great post it was very informative. I appreciate that you included those pictures for pruning, I see too many young healthy trees have their growth stunted from bad pruning jobs.
Great tips! Knowing where to plant in relation to homes and electrical wires is important to know before you even set the seeds in the ground. Thanks for sharing!
Good share and thanks for your insightful information! It’s great that you mention that pruning critical branches only and fertilization, watering, and pest control could be critical factors after all. I’m in the midst of tree care service for a client near revere ma, i have done this job for around 3 years, it’s hard if we have not paid attention to details and job guide.Goodluck and Keep sharing!
It’s true that trees need as many leaves as possible to recover from transplant shock. I often hire a professional when it comes to tree pruning, trimming or removal. After taking a tree pruning service from an expert arborist in RI area, i thought that what I’ve learned 3 years of DIY and tree care websites could not asses my landscape and trees as they did. Really enjoyed playing with professional, i felt happy when having some deals with them